Ubuntu 20.04 LTSがリリースされたので、VirtualBox上に環境構築します。
1. 筆者の環境
- Windows10 Home
- Oracle Virtual Box 6.1.6
- Ubuntu 20.04 LTS
2. Ubuntu 20.04 LTS のダウンロード
2-1.
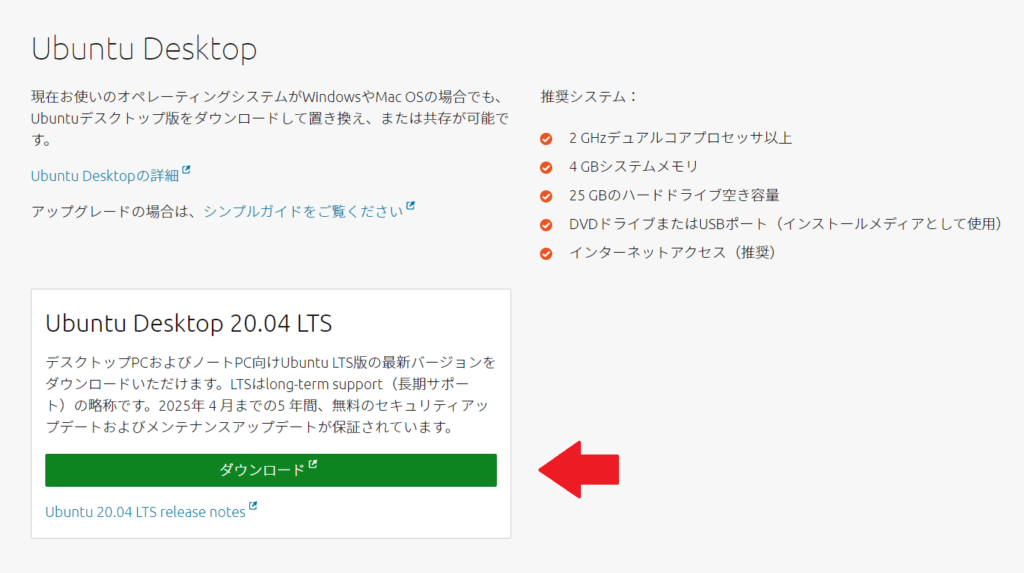
https://jp.ubuntu.com/download にアクセスする。
2-2. アクセス後、「ダウンロード」をクリックする。
3. VirtualBox上の設定
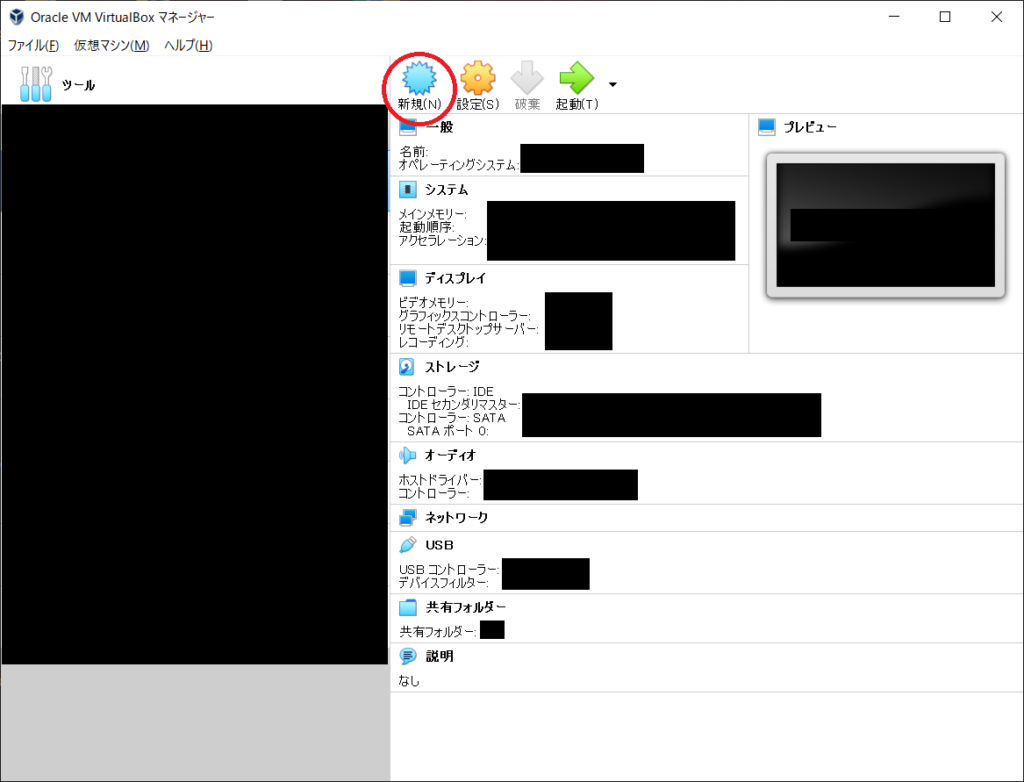
3-1. VirtualBoxを起動し、「新規 (N)」をクリックする。
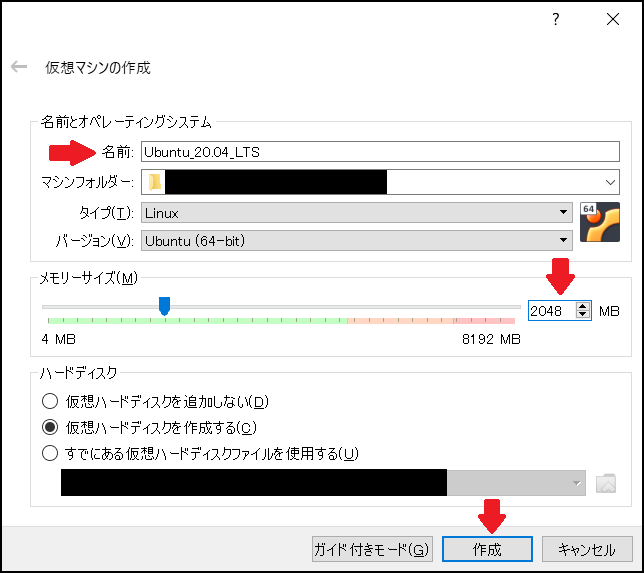
3-2. 「名前」と「メモリーサイズ」を設定し、「作成」をクリックする。
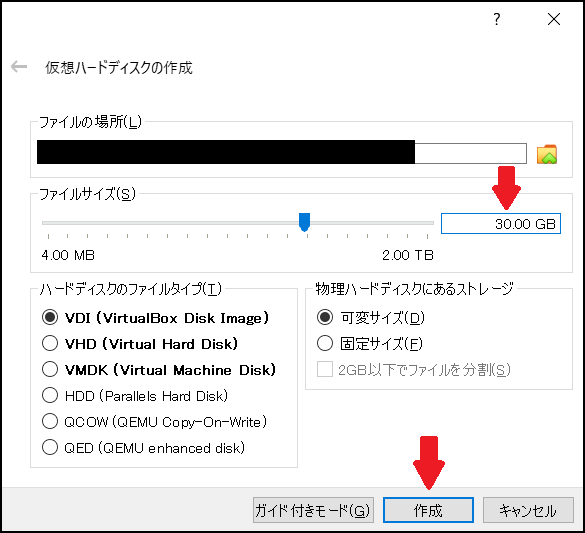
3-3. 「ファイルサイズ」を設定し、「作成」をクリックする。
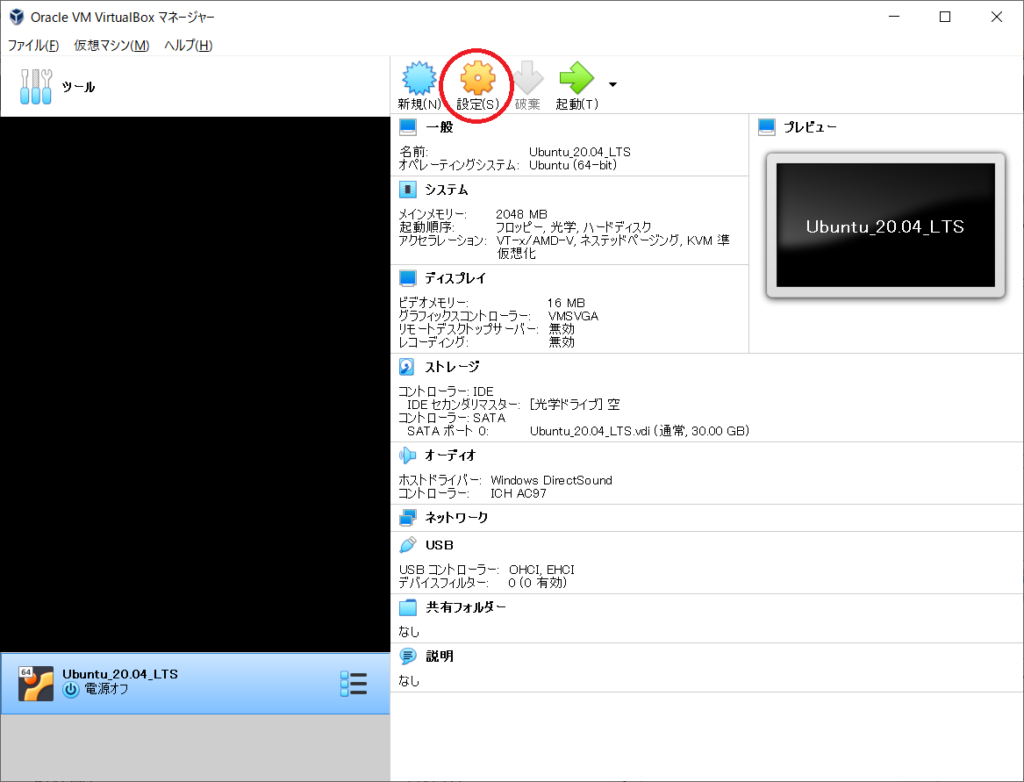
3-4. 作成した仮想マシンを選択し、「設定 (S)」をクリックする。
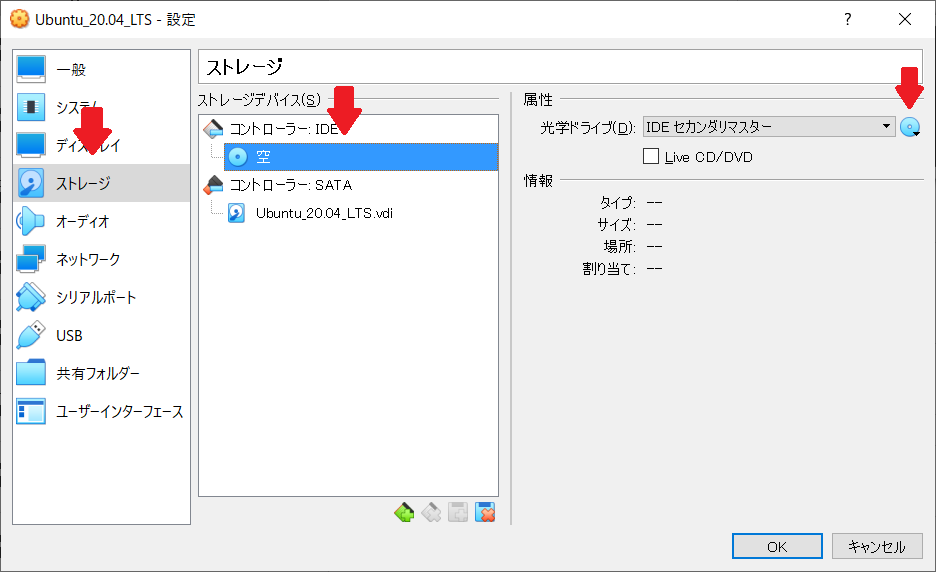
3.5 「ストレージ」を選択し、「コントローラー : IDE」の下にある「空」をクリックする。その後、「IDE セカンダリマスター」の右隣にある、アイコンをクリックし、「ディスクファイルを選択…」をクリックする。
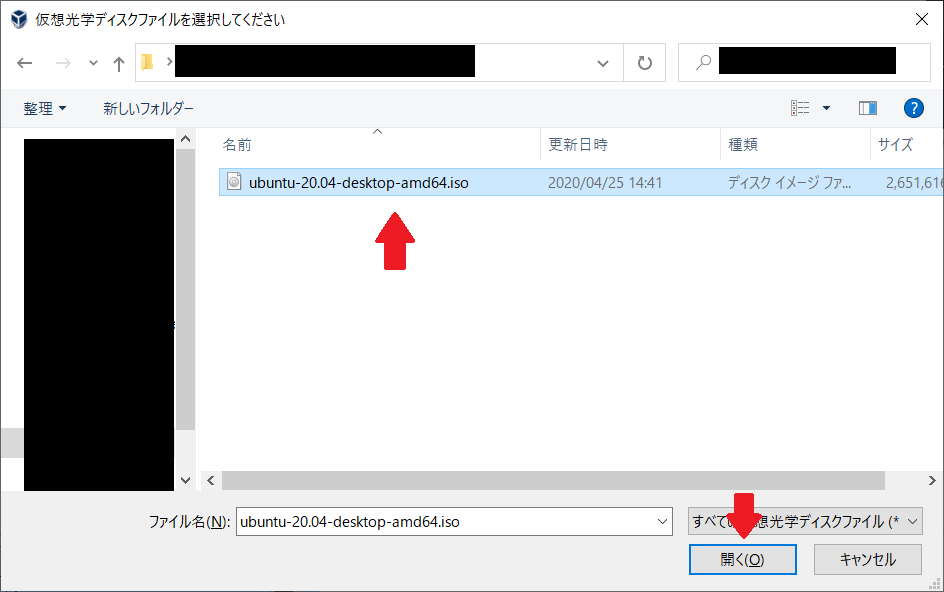
3-6. 先ほどダウンロードした「ubuntu-20.04-desktop-amd64.iso」を選択し、「開く (O)」をクリックする。
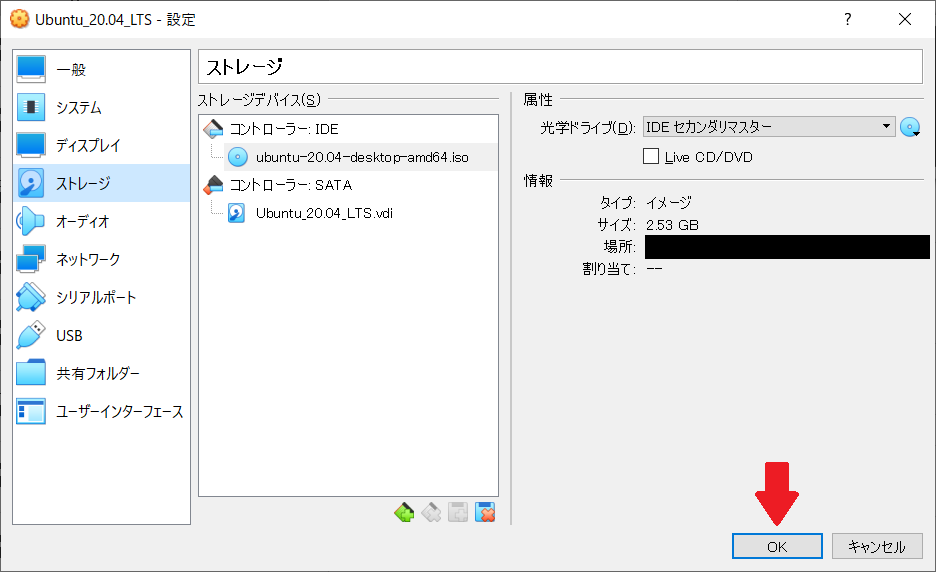
3-7. 「OK」をクリックする。
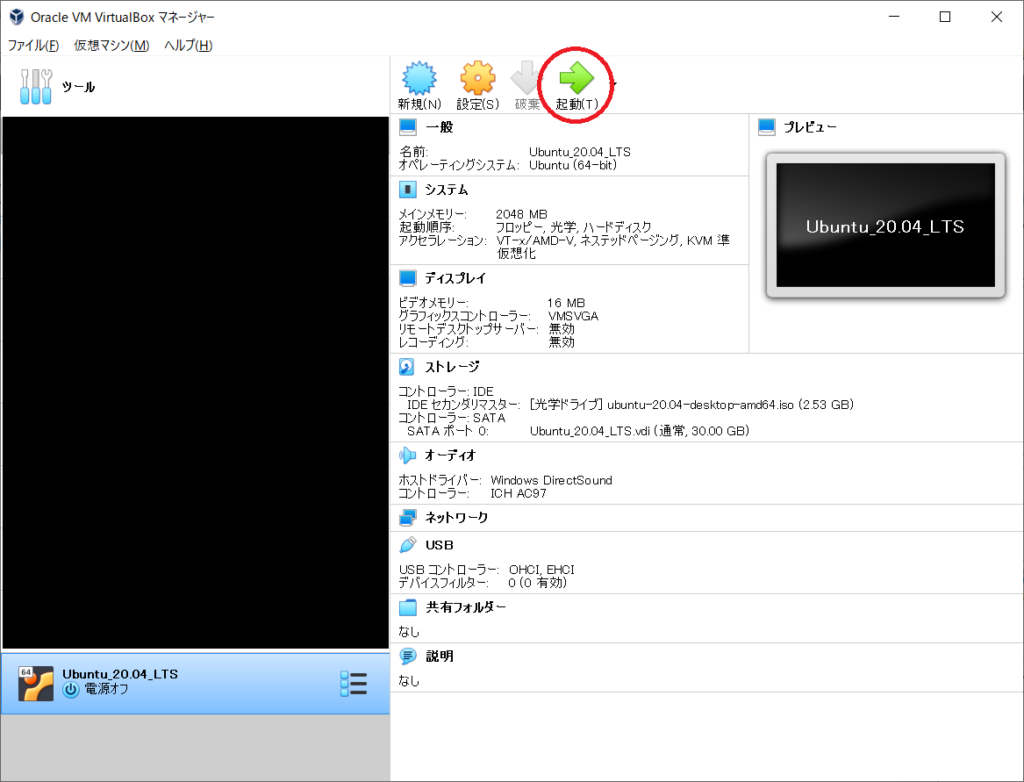
3-8. 作成した仮想マシンを選択し、「起動」をクリックする。
4. Ubuntu 20.04 LTS上の設定
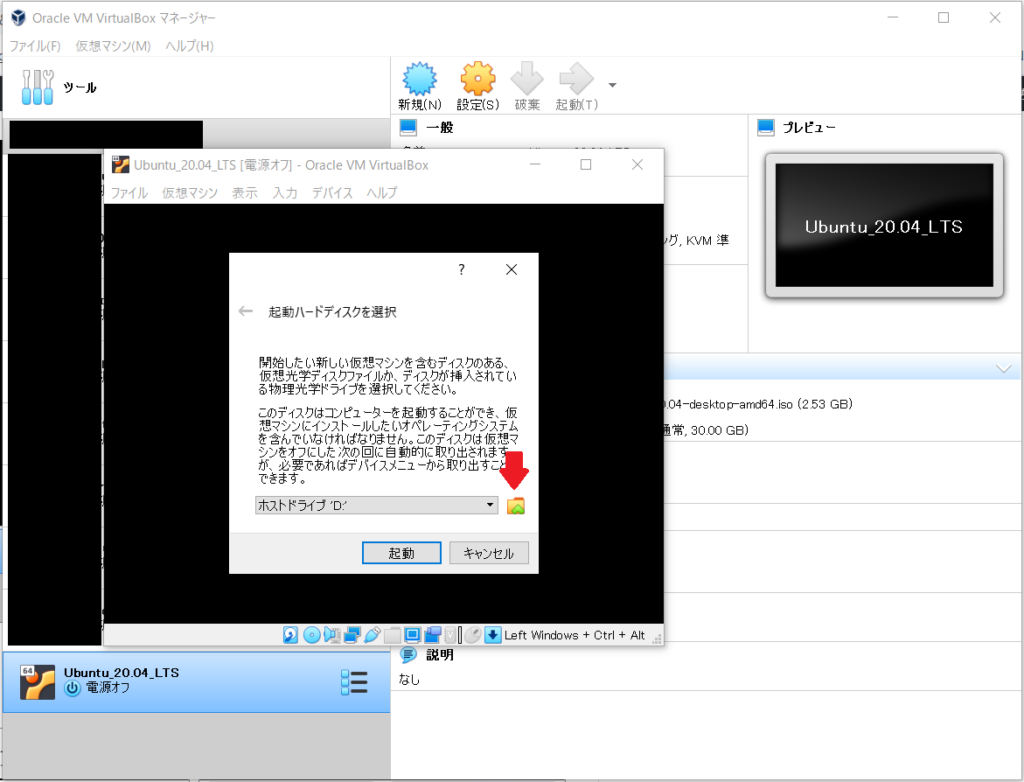
4-1. 「ホストドライブ」の右のアイコンをクリックする。
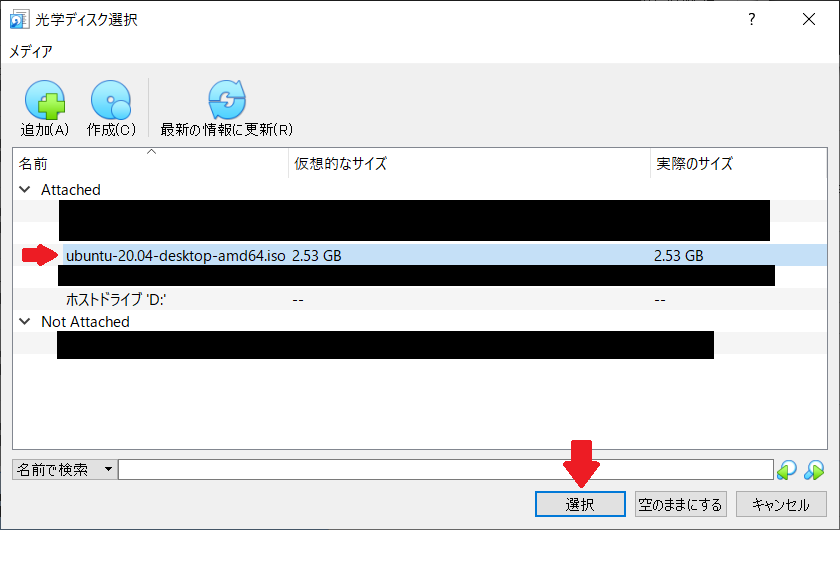
4-2. 「ubuntu-20.04-desktop-amd64.iso」を選択し、「選択」をクリックする。
4-3. 「起動」をクリックする。

4.4 あとは、Ubuntuの指示に従っていけば、環境構築終了です。